Global Content
Global Content Overview
Global content is content that is shared across portions of a website. Common examples are website headers, footers, and other items that can be used on multiple pages.
The benefit of using global content is the efficiency and consistency it provides. Global content items only need to be updated in one location in the CMS and the update will reflect across the site.
In the CMS, global content items are located under the Global Content page type.
Global Content Items
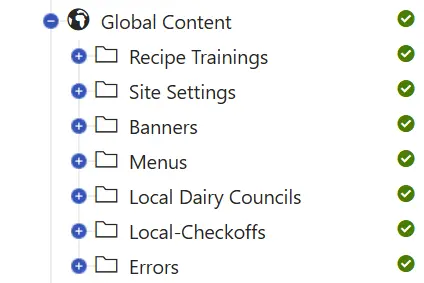
The following are global content items and can be located under the Global Content page type in the content tree.
- Recipe Trainings
- Site Settings
- Banners
- Menus
- Local Dairy Councils
- Local-Checkoffs
- Errors
How to Add a Global Content Item
- Navigate to the Pages Application.
- Find the Global Content page type in the content tree (look for the Globe page type icon).
- Click + to expand the Global Content page type.
- Click on the appropriate folder to select it.
- Click the + icon located in the content tree action bar at the top of the tree.
- Select the appropriate page type.
- Fill out at minimum the required fields (the fields with the red asterisk).
- Click the Save button.
- When you are ready for the item to be visible on the website, click the Publish button.
How to Edit a Global Content Item
- Navigate to the Pages Application.
- Find the Global Content page type in the content tree (look for the Globe page type icon).
- Click + to expand the Global Content page type.
- Click + to expand the appropriate folder.
- Click on the page that you wish to edit underneath the folder so that the page field information now displays in the View on the right hand side.
- Make the desired changes to the page fields.
- Click Save.
- When you are ready for the page to be visible on the website, click the Publish button.
How to Add a Page to the Navigation
The following instructions describe how to add a page to the website navigation by updating the Menus global content item. Use these steps after creating a new page that should be accessible through the website navigation.
- Navigate to the Pages Application.
- Find the Global Content page type in the content tree (look for the Globe page type icon).
- Click + to expand the Global Content page type.
- Click + to expand the Menus folder.
- Expand the appropriate navigation menu (e.g. Global Navigation Menu, Footer Navigation Menu, Utility Navigation Menu, or Sub Footer Navigation Menu).
- Select the menu item that you want to update or create a new menu item in the appropriate location.
- Update the Label field, if necessary.
- In the Link Url field, click the Select button and choose the page that you want to display in the navigation.
- If the navigation item should link to an external website instead of a page within the CMS, select the External Link? checkbox and enter the appropriate URL.
- Click the Save button.
- When you are ready for the changes to be visible on the website, click the Publish button.
NOTES:
- Select the appropriate navigation menu based on where you want the page to appear on the website (for example, the main navigation, footer navigation, utility navigation, or sub-footer navigation).
- Not every page should be added to the navigation. Add only pages that are intended to be accessible through the website navigation.
- Adding pages to the navigation should be done sparingly, since the current navigation is based on UX best practices.
- After publishing the changes, preview a page that displays the navigation (for example, the Home page) to verify that the navigation displays as expected.
How to Remove a Global Content Item
- Navigate to the Pages Application.
- Find the Global Content page type in the content tree (look for the Globe page type icon).
- Click + to expand the Global Content page type.
- Click + to expand the appropriate folder. For example, if you want to delete a menu item, click + next to the Menus folder.
- Click on the page that you wish to delete underneath the folder so that the page field information now displays in the View on the right hand side.
- Click on the trash bin icon located in the content tree action bar at the top of the tree.
- Click the Destroy Page and its History check box if you wish to destroy the page entirely (Optional).
- Click on the Delete button.
